Interfacing User-defined Macro-Constructions
One of the feature of Calques 3D is the possibility to create a geometrical figure and to save it as a macro-construction, i.e. as a single object whose intermediary elements will still be available for manipulation (we call them composite object). This in turn will allow you to build up a library of new figures that could be used for further constructions. Calques 3D also provides you with a very easy and intuitive way to configure the interface, mostly by dragging and dropping elements such as menu commands, toolbars, etc. across the interface.
This short article intends to give you instruction about how to declare which macro-construction are to be made available for the learners and how to use Calques 3D's configuration feature in order to make these macro-constructions available at the interface. So let's assume that you made a couple of macro-constructions in order to build some molecular models (e.g. macro-constructions for the Oxygen and Carbon atoms, for hexagonal and pentagonal structures, etc.).
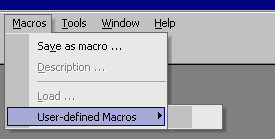
Figure 1. The Macros menu with an empty User-defined Macros.
Selecting the relevant macro-constructions
The first step in configuring Calques 3D is to specify which macro-constructions will be available for the learners and where they are stored in the computer.
Open the Customize dialog (menu File | Preferences ... ) and activate the Macros pane (see figure 2). Add a new item to the list, either by clicking in a row in the list or by clicking on the first icon on the upper-right part of the list. Browse the computer to assign a macro-construction file (extension *.m3d) to this item. As you validate you choice, note that the information regarding this macro-construction (i.e. file path, name and description appear below the list. Repeat these operation to add as many macro-constructions as needed. Note that the order on which they appear in the list only matters for the default command (the User-define Macros sub-menu mentioned above) but you will have full flexibility to create your own sub-menus (see below).
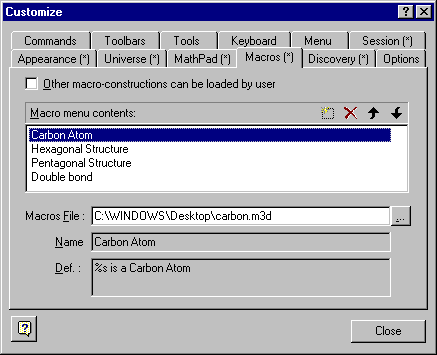
Figure 2. Add macro-constructions in the Customize dialog.
Please note that Calques 3D is actually limited to 15 macro-constructions. This should be enough to deal with most of the situations you may be faced with. But if the need for more macro-constructions arises, let me know and I will upgrade this limit. In any case, due to programming constraints, there will be ALWAYS a limit.
If you want the learners to be able to load any macro-constructions stored in the computer, select the relevant check box. Otherwise, the Macros | Load... command will not be enabled and only the macro-constructions explicitly added in the menus will be available.
Configuring the Macros menu
Once the macro-constructions selected in the list, close the Customize dialog to validate your changes. If you have a look in the User-define Macros sub-menu, you will see that it now contains the various macro-constructions you have specified in the Customize dialog (see figure 3). This is the default interface for accessing the macro-constructions but you can design a more appropriate interface, as follow.
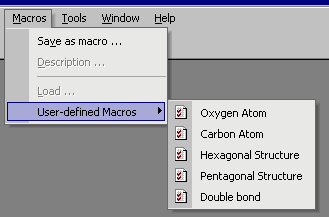
Figure 3. The User-defined Macros menu is now updated with your selection of macro-constructions.
Reopen the Customize dialog and go now to the Commands pane (see figure 4). The left-hand side list of the pane contains all the categories of commands available in Calques 3D (ordered by the menu they belong to, i.e. the File menu, the Edit menu, etc.). In particular, the Macros category contains all the commands available in the macros menu: Save as macro..., Description, Load... and the User-defined Macros sub-menu. It also now contains all the macro-constructions added in the Macros pane previously. This allows you to insert these commands in any menu you desire in Calques 3D. You can also build your own sub-menus in order to organise these commands in a better way.
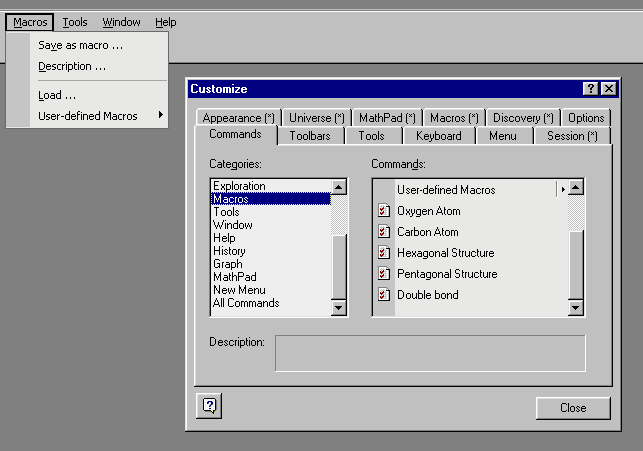
Figure 4. The macro-constructions are available as commands in the Customize dialog.
From the New Menu category, drag the New Menu command from the right-hand side list and drop it at the bottom of the Macros menu. Click on the newly installed command with the right button of the mouse to open the contextual menu (see figure 5) and select the Button Appearance command. In the dialog box, change the name of the menu to a more informative title (i.e. as Atoms, see figure 6) and validate your choice. Notice that you can only change the title of the menu and not its icon (as it doe not have any).
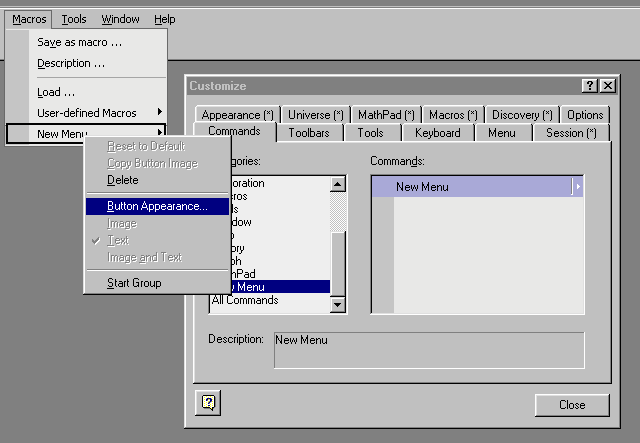
Figure 5. Add an empty sub-menu in the Macros menu and modify its appearance.
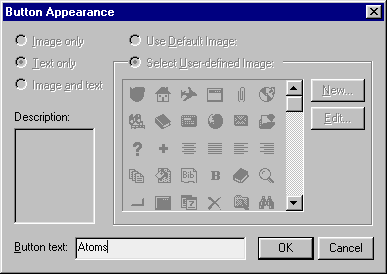
Figure 6. Change the name of the new menu to a more informative title.
The new Atoms sub-menu is now available to be filled with the relevant macro-constructions. Select again the Macros category in the Commands pane, and drag-and-drop all the commands you need from the right-hand side list (e.g. Carbon atom, Oxygen Atom, etc., see figure 7). Repeat these operation as many times as necessary to obtain an organisation of the commands adequate to you need.
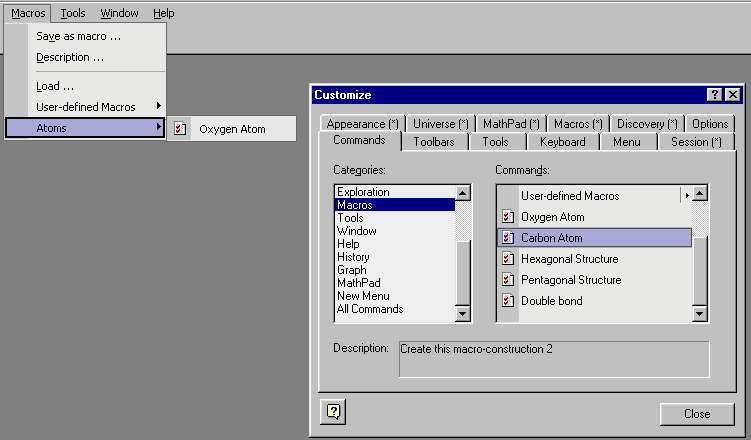
Figure 7. Add other commands from the Customize dialog into the new sub-menu.
Finally, you can delete the generic User-defined Macros sub-menu (just drag-and-drop it anywhere outside a menu or a toolbar). The Macros menu is now ready for usage (see figure 8). You can also create a dedicated toolbar to hold the shortcut to the macro-construction commands (using the Toolbars pane).
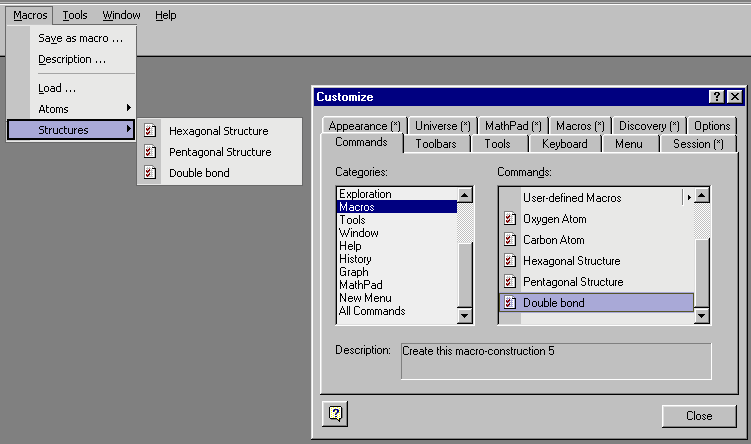
Figure 8. The final personalised Macros menu.
